
Take Control of Frizz: Why a Sleek Ponytail Works
Tired of hair that poofs up the moment you step outside? A sleek ponytail is a reliable, polished choice that tames texture and looks intentionally put together. It’s versatile enough for the office, errands, or a night out.
A smooth ponytail controls frizz, minimizes flyaways, and protects strands from humidity and friction. With a few beginner-friendly products and simple technique, you can get glossy results without spending hours.
This guide walks you through prep, tools, a clear step-by-step tutorial, fixes for common problems, and upkeep tips to keep your ponytail fresh day after day.
Follow these easy steps and you’ll build confidence styling sleek ponytails anytime, rain or shine for sure.


The Perfect Slick Back Ponytail Tutorial
Know Your Hair: How Frizz and Texture Affect a Sleek Ponytail
What causes frizz?
Frizz is simply hair behaving unpredictably when its surface cuticle or inner structure doesn’t sit smooth. The most common types:
Think of frizz as either a weather problem, a hydration problem, or a damage problem — often a mix.
Hair thickness and texture
Hair thickness (fine, medium, coarse) affects how products and heat behave:
A coarse, porous strand is like a sponge — it soaks up products but also loses moisture faster.
Porosity — why it matters
Porosity determines how well hair absorbs and holds moisture and styling products. Quick tests to identify your needs:
Checklist — identify your hair’s needs
How this changes product choice and technique
Match tools and products to the results of your checklist:
Knowing these basics turns styling from guesswork into a plan. Next up: Prep Like a Pro — the exact tools, products, and step-by-step prepping routine you’ll need before you pull your ponytail together.
Prep Like a Pro: Tools, Products, and Prepping Steps
Essential tools (buy once, use forever)
Product categories and how to pick them
Easy pre-styling routine (timing included)
- Wash or co-wash (10–15 min): choose shampoo or conditioner-only wash depending on oiliness and buildup.
- Condition and detangle in the shower (2–5 min): wide-tooth comb through while conditioning.
- Blot dry with microfiber or T-shirt (1–2 min): remove excess water, don’t rub.
- Apply leave-in and heat protectant (1 min): distribute from mid-lengths to ends.
- Rough-dry or air-dry to about 80% (5–10 min with dryer; 20–40 min air-dry): avoid fully wet hair before styling.
Quick, low-water routine: skip shampoo, co-wash or dilute conditioner at roots, and use dry shampoo at the roots later if needed — total prep under 10 minutes.
Next, you’ll use these tools and that 80%-dry canvas to build the sleek ponytail step by step.
Step-by-Step Sleek Ponytail Tutorial for Frizzy Hair
Get set (1–2 minutes)
Decide height: high for a polished, lifted look; mid or low for everyday sleekness. Work on hair that’s about 80% dry and have a tame-product (light gel or smoothing cream), a strong elastic, bobby pins, and a small brush handy. Use very small amounts of product and layer — a pea-size smoothing cream, then a dab of serum if needed.
- Sectioning: lay out your plan (30–60 sec)Decide whether to include the crown in the pony or leave a slight lift. For a smooth crown, create a horizontal section from ear to ear and clip the top piece briefly — it lets you smooth the back thoroughly without accidentally pulling the top forward.
- Smooth the crown (2–4 minutes)Apply a thin amount of light-hold gel or cream near the roots of the back section. Use a boar or mixed-bristle brush (the Goody brush above is ideal for control) to brush the hair downwards, following short, deliberate strokes to flatten cuticles without overworking the hair.
- Gather without tugging (30–60 sec)Use both hands: one to hold the base of the pony and the other to brush and guide the hair into place. Pulling from the ends creates tension and breakage — gather from root to elastic in one smooth motion. If you need extra control, pin the gathered base temporarily with a bobby pin while you prepare the elastic.
- Secure the pony (30–45 sec)Use a snag-free elastic and wrap twice for firm hold. To avoid a dent, loop the elastic once, push the hair through halfway (creating a half-loop), then wrap fully. For thick hair, use a coil elastic (no metal). Tuck bobby pins under the base to flatten any gaps.
- Finish details (2–5 minutes)Tame baby hairs with a clean toothbrush or small brush misted with hairspray or a tiny bit of gel; stroke gently. For extra sleekness, run a flat iron (e.g., BaBylissPRO Nano titanium) down the length of the pony on low–medium heat — clamp small sections quickly to avoid damage. Wrap a 1–2 inch section of hair around the elastic and pin underneath for a seamless look. Finish with a light mist of shine spray.
Quick no-heat alternative (1–2 minutes): use a stronger smoothing balm, brush thoroughly with tension, secure as above, and smooth edges with a product-dampened toothbrush.
Next up: common problems — bumps, flyaways, and hold issues — and how to fix them fast.
Troubleshooting Common Problems and Easy Fixes
Puffy crown (ponytail that puffs at the crown)
If the top billows up after you secure the pony, try a tiny, targeted fix: gently backcomb a 1–2 inch strip of hair right under the crown to create hidden lift, then smooth the top layer over it with a soft brush. Alternatively, clip the top section while you smooth the back, release and lightly press with a flat brush; secure with a couple of bobby pins tucked under the base for long-lasting control.
Visible flyaways
Tiny hairs around your face can look messy fast. Layer a pea-sized anti-frizz serum (e.g., Paul Mitchell Super Skinny) with a light-hold gel or styling cream (try Ouai Finishing Crème) — serum seals cuticles, gel locks. Use a clean toothbrush or mascara wand dipped in gel to stroke baby hairs into place, then blast once with lightweight hairspray (L’Oreal Elnett works well for a smooth finish).
Limp or flat ponytail
If your pony lacks body, add texture and lift at the roots: sprinkle a pinch of volumizing powder (SexyHair Powder Play) or spritz a texturizing spray at the root, then roughen slightly with fingertips and secure. For heat users, a quick root blast with a round brush and blow-dryer at the hairline instantly boosts body.
Elastic causing creases
Dents from elastics are avoidable. Swap to spiral elastics (Invisibobble), fabric-covered elastics, or a silk scrunchie to reduce pressure. Try the “half-loop” trick: loop once, push hair halfway through, then finish the wrap — this avoids sharp creases while keeping hold.
Frizz reappearing in humidity
Humidity is the frizz enemy. Finish with an anti-humidity topcoat like Living Proof No Frizz Humidity Shield or MoroccanOil Flexible Hairspray. Seal ends with a feather-light oil (one drop rubbed between palms) and resist touching your hair; oils and topcoats together create a barrier that lasts through commutes and weather shifts.
Sensitive scalp or pain from a tight ponytail
If your scalp hurts, loosen the tension immediately — pain is a sign of strain. Move the pony lower or higher for a more comfortable anchor point, switch to a softer scrunchie, or use a broader band to spread pressure. Alternate ponytail days with loose buns or braids to prevent chronic soreness.
Quick touch-up bag hacks:
Next up: learn how to keep this sleek look fresh day-to-day and protect hair health with simple aftercare and long-term tips.
Maintain the Look and Keep Hair Healthy: Day-After Care and Long-Term Tips
Sleep smart: preserve your sleek overnight
Protect the finished ponytail while you sleep. Silk or satin pillowcases (Slip is a popular brand) cut friction; a silk scarf tied loosely around the base works too. Choose your overnight hold based on hair type:
Morning refresh without a wash
Quick, non-wash fixes keep the shape and oil at bay:
When (and how often) to wash
Avoid daily washing if your goal is to maintain moisture and reduce frizz. Signs it’s time: heavy product buildup, scalp itch, or visible grease.
Weekly and monthly habits to cut frizz long-term
Exercise, humidity, and knowing when to go gentle
For workouts, tie hair in a loose, low pony under a breathable sweatband; post-sweat, mist roots with dry shampoo and re-smooth. In high humidity, switch to gentler styles (low bun, loose braid, or a silk-wrapped pony) for a few days to reduce tension and friction. Rotate styles regularly — frequent tight ponytails increase breakage risk, so give hair rest days with protective, low-tension looks before you move to the Conclusion section.
Wrap-Up and Quick Start Checklist
Sleek ponytails are simple when you assess your hair, prep right, follow the step-by-step method, troubleshoot small issues, and protect hair long term. Start small, practice the smoothing move, and prioritize health to keep styles damage-free.
Quick start checklist:
Try it tonight — save this checklist and practice once a week for faster progress today.

Hello! I’m Ava Wilson, a passionate advocate for healthy, beautiful hair. With years of experience in the hairstyling industry and a deep-rooted love for all things hair, I’ve made it my mission to share valuable insights and expert tips on nurturing and styling locks.

Tried this last night — wow. The step-by-step was actually super easy to follow. I used the Garnier Fructis serum like the article suggested and it smoothed my flyaways right away. My only gripe: the tutorial assumes you have a hair tie that doesn’t stretch out. Anyone know good ones that keep a sleek look without a huge bump?
Don’t over-tighten if you’re trying to avoid a bump. Tighter looks sleek in photos but can make the scalp ache lol.
I use the spiral ones (not sure of brand) and they’re magic. Also putting a bobby pin under the elastic helps flatten the bump — learned that from the Troubleshooting section here.
Great to hear it worked for you, Liam! For minimal bump I usually recommend snag-free silk or spiral hair ties — they hold well and don’t leave dents. Goody also makes some good elastics if you prefer fabric-covered ones.
Tried the tutorial and my ponytail actually stayed overnight — who knew? Biggest win: the troubleshooting tips on baby hairs. Still, struggled with the part where you flatten the crown without making it look too tight. Any suggestions?
I do a tiny poof at the crown before pulling everything back — like 1/2 inch of lift. Works on most head shapes.
Glad it stayed! For the crown, gently backcomb a small underside section at the roots and smooth the top layer over it — gives the illusion of volume without looseness. Use two bobby pins crisscrossed under the pony to lock that shape.
Does anyone have tips for keeping the sleek ponytail when it’s humid out? I live in a place where frizz comes back in 10 minutes despite my best efforts. The article mentions humidity stuff but I need a down-and-dirty routine.
I keep a tiny travel-size serum in my bag and reapply sparingly to the edges. Makes a surprising difference on commute days.
If all else fails, low bun >> sleek pony. Buns survive humidity a tad better sometimes.
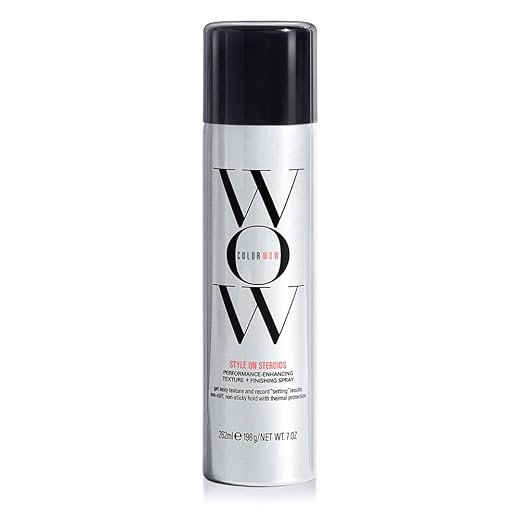
Humidity is the nemesis. Quick routine: 1) Use a smoothing serum (Garnier) on damp hair, 2) dry with tension using the Goody wood brush, 3) flat iron with CHI 44 sprayed, 4) finish with a light mist of COLOR WOW at the roots to lock, and 5) smooth edges with a dab of the serum on a toothbrush. Avoid heavy creams that attract moisture.
Also try anti-humidity hairspray if you can — and avoid touching your hair. Sounds dumb but hands + humidity = frizz party.
Long post bc I’m taking notes here — hope that’s ok!
1) Prep: I always add a tiny bit of Garnier serum before drying.
2) Tools: Goody Smooth & Sleek Wood Styling Brush is worth every penny for me — it really tames the halo.
3) Finish: a light mist of CHI 44 before the straightener, then a touch of COLOR WOW at the roots for texture.
Totally works for my wavy-but-frizzy hair. Pro tip: sleep with a silk scarf to keep it intact overnight. ✨
Nice checklist! Silk scarf = underrated. Also, what’s your favorite way to re-slick on day 2 without washing? I always end up using too much product and it looks greasy.
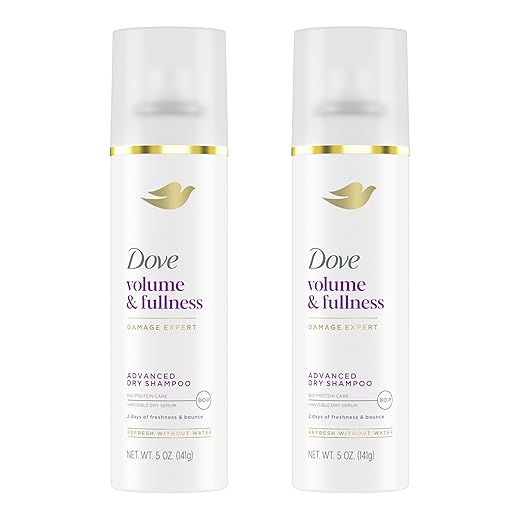
For day 2, use a dry shampoo at the roots (Dove Volume & Fullness is in the article and a good pick), and a tiny dab of serum on the ends only. A quick ponytail re-tie and a few bobby pins can refresh the shape without adding grease.
Haha toothbrush hack works! Also try that texturizing spray but apply sparingly — adds grip for styling without oiliness.
I spritz some water on the edges and smooth with a toothbrush + serum. Low product, precise control.
Not trying to be negative but the article felt a touch product-heavy. Like, it lists a bunch of Amazon items — are they essential or just suggestions? Some of us want a budget version.
Totally fair point. The products listed are recommended options that make the process easier, but many steps can be done with budget alternatives. The key is heat protection, smoothing serum, and a good brush — cheaper brands often have equivalents. We can add a budget-friendly substitution list.
Agreed — I swapped in a cheaper heat protectant and it still worked fine. The Goody brush is the only splurge I regret skipping; the wood handle helped control static more than my plastic one.
If you already have a leave-in conditioner and a boar-bristle brush, you’re basically set — no need to buy everything.
Okay honest question: my hair is super thick and frizzy, and flat irons never seem to keep it smooth. The article mentions CHI 44 Iron Guard—is that enough for heat protection, or should I be using something else before straightening?
Not to be extra dramatic but a good blowout makes all the difference. Even for thick hair, patience + sectioning = less frizz later.
If it’s humidity you’re fighting, COLOR WOW Style On Steroids is surprisingly good at locking in that polished look afterward.
I second that. CHI 44 + a lightweight serum = fewer passes with the flat iron. Also try the Goody wood brush while blow-drying for sleekness before ironing.
CHI 44 is a solid thermal protectant and helps reduce heat damage, but for very thick hair combine it with a smoothing serum (like Garnier Fructis Sleek & Shine) before straightening. Also work in small sections and don’t set the iron too hot — multiple passes at a lower temp are better than one scorched pass.
Nice tips overall. I do wish the article had more pics for each step though. Words are great but visuals would help the beginner-level tutorial a lot. Also, shoutout to the Dry Shampoo rec — Dove’s stuff saved my 2nd-day ponytail.
Agreed on the pics. Even simple step shots would make it easier to replicate the exact placement of bobby pins and slicking technique.
Thanks for the feedback, Marcus — we’re considering adding a photo walk-through in the next update. Glad Dove dry shampoo worked for your day-after maintenance!
Quick funny story: I followed the tutorial and ended up looking like a ’90s pop star for two minutes before I refined it 😂 But the advice on smoothing with serum + using a wood brush actually cut my styling time in half. Loved the Wrap-Up checklist — super handy for mornings.
Ha, a 90s pop star is still sleek in our book. Glad the checklist helps — great idea to laminate it!
Pop star era is a vibe! Sometimes I purposely do the 90s high pony for workouts. The checklist saved me too — laminated it and put it in the bathroom mirror lol.
Loved the maintenance section. I was skeptical about Day-After care but Dove Dry Shampoo + silk scarf advice actually worked for me. FYI I do one light spritz right at the roots before bed and my 2nd day ponytail still looks fresh. 🙌
Pro tip: don’t overdo dry shampoo or it builds up. A little goes a long way.
I do the same but I use a tiny bit of dry shampoo at the roots and a brush-through in the morning. Keeps volume without residue.
Nice trick — spraying before bed is clever and helps absorb overnight oils. Glad it worked for you!
This one’s long bc I experimented for a week and wanted to share results — hope that’s cool
Day 1: Followed tutorial exactly, used Garnier + CHI 44 + Goody brush. Sleek ponytail lasted all day, compliments received.
Day 2: Used Dove dry shampoo and a small touch-up with the serum on the ends. Looked almost as good.
Day 3: Repped a low bun. Hair felt healthy and not crunchy.
Biggest takeaway: the order of products matters WAY more than the brand. Little mistakes: put too much texturizer once and it looked fried, haha. Overall 9/10 would recommend.
Thanks for the detailed testing, Hannah — so useful for others! Love that your hair stayed healthy through the routine.
Appreciate the report — very actionable. Order of ops is key indeed.
Good question — I used a clarifying shampoo once during the week and that was enough. No heavy buildup for me but YMMV.
Did you notice any product buildup after a week? I’m worried about long-term residue when using serums + sprays daily.
Short and sweet: article is practical, no fluff, liked the troubleshooting section. One weird thing — the texturizing spray (COLOR WOW) was recommended but I found it made my hair a bit stiff. Anyone else notice that? Maybe apply less?
Good observation. Texturizing sprays can vary — COLOR WOW is meant to add grip, but applying too close or too much can feel stiff. Try spraying at the roots from 8-10 inches away and scrunching through with fingertips to distribute.
I dilute the effect by layering: tiny amount of serum first, light spritz of texturizer, then smooth with a brush. Keeps it flexible.