
Step-by-Step Guide to Perfect Flat-Iron Curls — Fast, Frizz-Free
Quickly master smooth, long-lasting flat-iron curls without excess heat or midday frizz. This guide shows prep, precise technique, and quick finishing moves so your curls look salon-worthy, last longer, and stay frizz-free with minimal time and effort for everyday confidence.
What you’ll need

Curl Your Hair Instantly with a Flatiron: Quick, Easy Tutorial
Prep Hair Like a Pro
Why damp hair is the enemy — and how to prime your mane in under five minutes.Start with clean hair that is completely dry or towel-dried then fully air-dried; never clamp on wet strands.
Apply a thin, even layer of heat protectant from mid-lengths to ends, concentrating on the most damaged sections.
Concentrate product on the last 2–3 inches when ends are straw-like or porous so the iron slides smoothly.
Use a tiny bead of lightweight serum on the ends to smooth cuticles only if your hair tends to puff — remember: less is more.
Brush thoroughly to remove tangles and distribute product evenly across each section.
Minimize damage by prepping well so you’ll need fewer passes with the iron, producing smoother, shinier curls.

Pick and Preheat the Right Iron
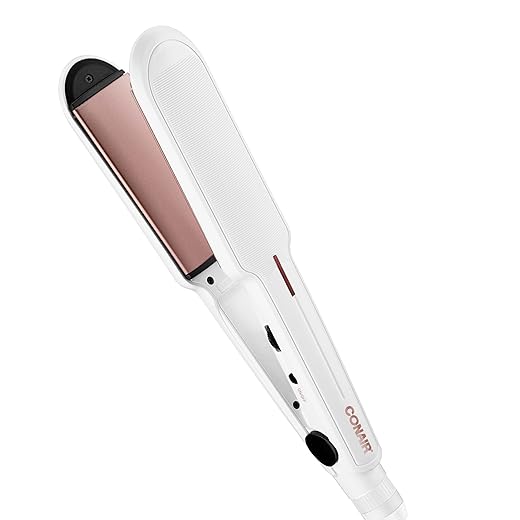
Don’t overcook it: hit the temperature sweet spot for your hair type and texture.Choose a flat iron with rounded plates for curl versatility. Pick a 1–1.25 inch plate width for most hair lengths — larger for loose waves, 1″ for tighter curls.
Set temperature based on hair porosity and condition. Use these ranges as a guideline:
Let the iron reach full temperature before you touch hair; the correct heat helps you form a smooth bend in one pass and saves time. Test on a small hidden strand first to avoid frizz or burn marks.
Section Strategically for Speed
One messy sweep ruins the whole look — use the two-line partition trick for even curls.Divide hair into clean sections: clip the top half up and start with the lower nape sections. Work from the back forward so finished pieces don’t get in the way.
Create rows based on length — for long hair use three rows per side; for short hair two rows often suffice. Take consistent subsections of ½–1 inch depending on curl size — thinner for tighter spirals, thicker for loose waves.
Keep section sizes uniform so curls set at the same rate and look balanced. Work methodically to speed up the process and avoid reworking missed or over-processed pieces.

The Clamp-Twist-Pull Move
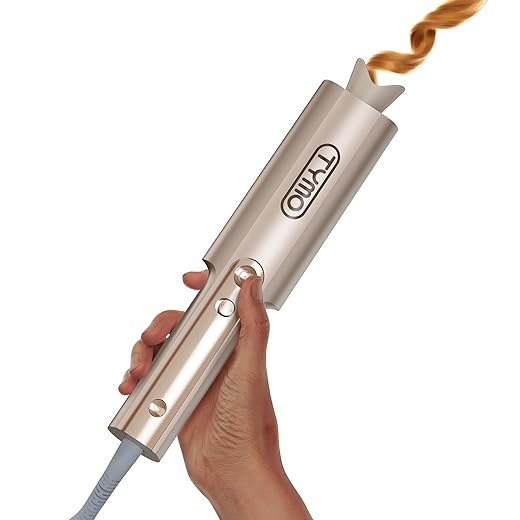
The signature three-step combo pro stylists swear by — clamp, twist, and glide for perfect curls.Clamp the iron about ½–1 inch from the roots (never on the scalp). Rotate the iron 180° away from your face so the hair wraps around the plates, then glide the iron down the hair while maintaining the twist.
Keep the motion steady and controlled — too fast gives weak bends; too slow risks heat damage. Alternate curl direction on adjacent pieces for natural movement, and curl away from the face on most front pieces to frame features. For example, on a quick morning run-through, curl one side clockwise and the next counterclockwise for effortless bounce.
Seal and Smooth to Fight Frizz
Finish like a pro — anti-frizz seals that lock shine without weighing hair down.Let each curl cool in your hand for 5–8 seconds before releasing to lock the shape. This simple pause sets the bend so curls stay springy all day.
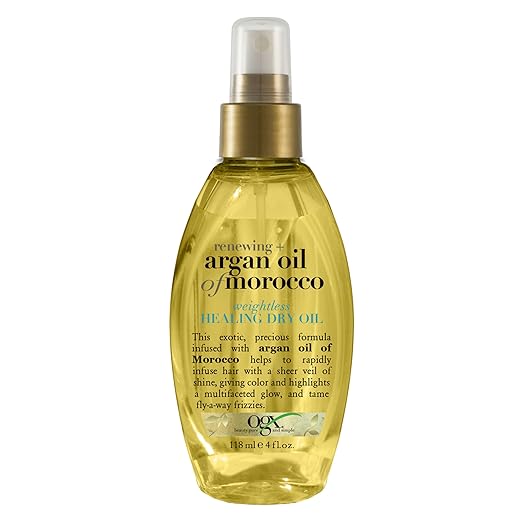
Apply a tiny drop of lightweight oil (argan or jojoba) to your palms, rub, then lightly scrunch or smooth through the mid-lengths and ends to add shine and tame flyaways. For example, use one drop for fine hair and two for thicker hair — avoid heavy creams that weigh curls down.
Mist a light-hold hairspray from arm’s length for extra hold and no stickiness, then let it dry naturally to preserve elasticity and movement.
Cool, Set, and Quick Touch-Ups
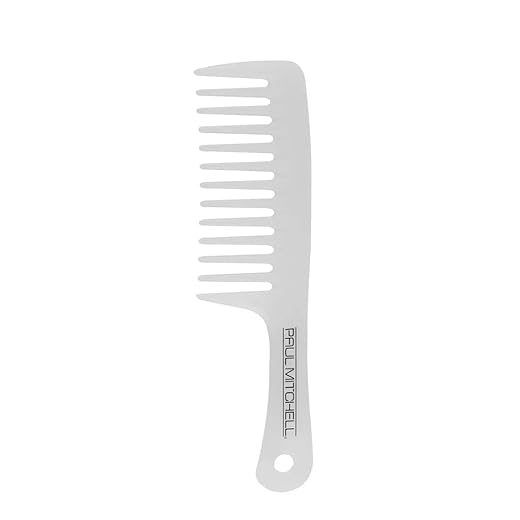
Why patience beats product — cool-down sets last longer, and smart rescues revive curls in seconds.Allow curls to cool completely before touching — this locks the shape. Gently break curls with your fingers for soft waves, or use a wide-tooth comb for a more relaxed look. For example, run fingers through ends to separate ringlets, or comb once from mid-lengths to ends.
Revive second-day curls by lightly misting with water or a curl-refresh spray, then re-wrap problem pieces around the flat iron on a low heat for 1–2 seconds. Carry a mini oil or smoothing stick to tame flyaways and add shine — dab sparingly on ends.
Ready, Set, Shine
With the right prep, temperature, and technique you’ll get fast, frizz-free flat-iron curls that last. Practice the clamp-twist-pull motion, refine sectioning to save time, then try it, snap a photo, and share your results today proudly and tag us please

Hello! I’m Ava Wilson, a passionate advocate for healthy, beautiful hair. With years of experience in the hairstyling industry and a deep-rooted love for all things hair, I’ve made it my mission to share valuable insights and expert tips on nurturing and styling locks.


Tried the method on my really thick hair and it took longer than the guide said, but the results were worth it. A couple of things I learned:
– Section strategically: tiny sections near the face, bigger in the back.
– Use a heavier product at the ends only.
– Let each curl cool fully before touching.
Also the ‘seal and smooth’ step is key — don’t skip it. My frizz dropped dramatically after switching oils. ✨
Funny I always overthink it but a small comb-through after 10 minutes cool down helps redistribute the curl into a more natural wave.
Same — argan saved my life. Also, run the iron just once per section to avoid ‘over-cooking’ the hair.
Argan oil light formula for me. A tiny dab warms in hands and smooths without making roots greasy.
Thanks for the detailed share! Thick hair definitely needs bigger sections in the back — and patience while cooling. What oil did you end up using?
Great tips all — thanks! One more: if you have very coarse hair, slightly higher heat + single firm clamp tends to hold better than multiple gentle passes.
I’ve been doing the twist-pull for years but the ‘seal and smooth’ step in this guide actually made a huge difference. My curls last longer and look shinier.
Little rant: people who say you need expensive tools are kinda lying. Technique + prep = most of the result.
Also: don’t over-clip your sections. You end up redoing them and wasting time. Be strategic!
Totally agree — skill and prep trump price in many cases. Glad the seal-and-smooth step helped. What products are you using for shine?
I use a micro-dose of silicone serum at the ends — works wonders without greasing up the roots.
Pricey tools are sometimes faster, but practice with what you have is the real shortcut.
Quick question — the guide mentions ceramic vs titanium plates. I have a cheap chrome iron, is it worth upgrading? My curls don’t last more than a couple hours.
Upgrading can help. Ceramic gives even heat and is gentler; titanium heats faster and holds high temps (better for very thick/coarse hair). If your curls fall fast, tech + product (light hairspray or setting spray) both matter.
If buying new, look for adjustable temp and 1-inch plates. I switched and noticed longer hold + less frizz.
Does anyone have tips for keeping curls overnight? I tried loose buns but it flattened my roots. Should I sleep with a silk pillowcase + pineapple, or is there a better quick fix?
Silk pillowcase + loose pineapple works for me. Also sleep with a soft scrunchie at the very top — keeps volume but not squashed.
Honestly, I tried once and looked like a poodle. Maybe I’ll attempt again when I have more patience. Guide was clear tho, good job writing it.
Long post incoming — this guide helped me troubleshoot a million little mistakes. Posting my experience in case it helps others:
I used to get uneven curls — tight at the top, limp at the bottom. Turns out I was doing inconsistent section sizes, and my heat setting was too low for the thicker hair near the nape. Fixed it by: matching section size to hair thickness, preheating properly, and using a quick spritz of holding spray before the cold set. Also, if your ends look dry, seal with a very small amount of oil after everything cools.
PS: Patience is underrated. 20 extra seconds of calm = better curls than rushing through 10 minutes of chaos. 😅
Love the ’20 extra seconds’ line — so true. Rushing ruins the whole vibe.
This is gold — thanks for the thorough rundown. The point about matching section size to thickness is something we should emphasize more in the guide.
Sophia — yes! Light holding spray before cold set helps on humid days, but don’t overdo it or you’ll get crunchy texture.
Anyone tried the before-spray + cold set method? Curious if it makes a big difference on humid days.
Okay I read the whole guide and took notes. Here’s my checklist that actually helped me get consistent results:
1) Dry hair 95% — damp strands = frizz city.
2) Use a cream protectant + light shine serum (apply after heat, not before).
3) Work in 1-inch sections near the crown, 1.5 for the sides.
4) Clamp-twist-pull with a steady motion, don’t rush.
5) Finish with cold blast and finger-comb.
Saved this to my phone, will try tonight. Also: anyone else find the iron temp recommendations too high for fine hair?
Great checklist — thanks for sharing! For fine hair we usually advise starting at the lower end (250–300°F) and only increasing if curls don’t hold. Glad the guide helped.
Also worth noting: if you have heat-damaged fine hair, use ceramic plates and a single quick pass instead of multiple passes.
I lower mine to ~275°F and it’s fine. If I go hotter the curls fall out and my ends feel crunchy. Fine hair = patience, not heat.
Try a texturizing spray after the cold blast — holds better without making it crunchy.
Tried the clamp-twist-pull move this morning and omg, game changer. Took me like 10 minutes for my whole head when I actually sectioned properly. Pro tip: clip the top layers pretty high so you don’t overwork the underneath. 🙌
Yep 1-inch here too. Less fiddly than the tiny wands. Also, spray a light heat protectant and you’re golden.
Nice! Love hearing about the time savings. Which iron plate size did you use? The guide recommends 1-inch for medium hair to speed things up.
How long do you clamp for? I always over-clamp and end up with crimpy bits 😅
Good guide. Liked the frizz-fighting tips. Straightforward and not too much fluff.